Installing 3" Ram Horn Manifolds on a C/10
Yes, you read that right. 3 inch!
When looking at my options for a better flowing exhaust on my ’69 C/10 with a 406 engine, I decided I wanted to try the Tru-Ram exhaust manifolds. My truck had stock ram horn manifolds and 2 ¼” exhaust when I bought it. While I do like some aspects of the stock ram horns, I had one major problem with them. On my engine with Vortec heads and center bolt valve covers, the stock ram horns were touching the valve covers in a few areas. I know what that will lead to overtime…cooked valve cover gaskets that leak.
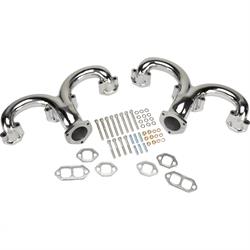
I have always loved the look of the Tru-Ram manifolds with the big swooping shape. Another big plus is they sit out away from the valve cover substantially further than the stock ram horns, which solved that issue. The seal up of manifolds versus headers is another reason why I went this direction. The only problem with this particular choice was that they don’t fit my truck as is.
After mocking them up on the truck, taking measurements, and some creative thinking, I ended up with a plan to modify these manifolds to fit my needs. At the point where the manifolds join all four exhaust passages together, they measure close to 3” outside diameter as well as being relatively round in this area. With that, I decided that I could likely cut the manifold and weld a 3” mandrel bend to it. And there lies my last big hurdle…welding steel tubing to a cast iron manifold.
I read several write-ups and watched a few videos about welding on cast iron. The majority of the experts probably wouldn’t recommend what I was about to do, but I forged ahead anyway. One of the best recommendations I found for welding on cast iron was to test your welding procedure on a scrap piece if possible because cast iron varies a great deal. Some cast-iron will tolerate welding fairly well and for others, it’s nearly impossible.
I decided to go forward with my attempt and cut one manifold. Once I had it cut, I did some test welding with the bottom portion of the manifold that I will no longer use. I found a short piece of 3” scrap tubing lying around the garage and started experimenting. With the only welder I had being a MIG, I went ahead and tried it out. The general consensus when welding cast iron is that you want to keep your heat input to a minimum. I started with very conservative voltage settings and crept up slowly to where I was getting a decent weld. The cast iron manifold certainly doesn’t weld like steel does, but I was able to weld the steel tubing to it without having any popping or pinging sounds as it cools, which are cracks forming.
Now that I had about two-thirds of the joint welded I decided to try a long pass, which would impart a lot more heat. At this point, I wanted to see how careful I needed to be when welding up my finished product. To my surprise, it seemed to recover from the long weld pass very well.
Once the test piece cooled completely, I tried dropping it onto a concrete floor from about a foot off the ground. It held up well and no signs of cracking were present. I tried another drop from about 2 feet and again, it looked fine. Now, I decided to give it the heavy-duty test with several blows from a 3-pound hammer. I probably hit the part 10 times before I decided it wasn’t budging. In one spot, the cast iron started to deform slightly from the hits and still no cracking or separation.
At this point, I was confident I could weld steel tubing to the manifolds. I began test fitting some bends. Originally, I started with a 45-degree bend exhaust elbow pipe. After cutting it down and test fitting, it was very obvious that I needed more than a 45-degree bend to clear the cross member and fit properly. My next step was to cut a U bend exhaust pipe in half which left me with two 90 degree bends. The 90 degree bends ended up being a bit too much, so I then cut a bit further down the bent section to get just the right exit angle on each side.
With both sides fitted up well I was on to welding them together. Even though I had success with longer welds on my test piece, I kept to about 1” long welds max to keep the heat down. After I had them fully welded, I put an extra gusset along the inward and outward-facing sides and welded it on as well. This extra material will give me two welds onto the cast iron manifolds to hopefully sustain the heat and vibration that exhaust is subject to. I wasn’t able to gusset them 360 degrees, due to the spark plugs being close.
After welding, I did a quick clean up in my blast cabinet and proceeded to paint them with some high temp exhaust paint. To connect the exhaust system, I used Hooker exhaust coupler instead of the typical 3 bolt exhaust flanges. The couplers are very small around the perimeter of the exhaust pipe and worked much better for me in the tight space I had to work with.
This project turned out great and I now have one of the few, if not the only 3” ram horn manifolds in existence. Time will tell how long my welded cast iron manifolds hold up, but I think they should be fine. In hindsight, I do wish I had started with either of the unpolished or polished stainless steel exhaust manifolds and have them TIG welded. Oh well, live and learn. I was able to get this project finished relatively cheap and without hiring someone to weld it for me. I call that a success.