How to Install a Drive Shaft Loop - 1967 Chevelle
This article covers the installation of our Universal Drive Shaft Loop kit. Why do you need a driveshaft loop? NHRA says you do if you’re going to run slicks on the drag strip. Since one of my sets of tires for this car is a very sticky pair of piecrust slicks and the other is an equally tacky compound drag radial, I need one. Your local track may be more lenient or strict on this requirement depending on the tech program and inspectors. My local tracks are far enough from home that it would make me very upset to be turned down in tech for something like this. So, I take a pro-active stance.
Why does NHRA, etc. require you to have driveshaft containment within 6” of the front u-joint? Because if you break a front u-joint or driveshaft, it can become a projectile or pole-vault your car. The normal place for this to occur is on the starting line, where people, property, and facilities might be damaged.
My other motivation for wanting to run a driveshaft loop is based a little more in a real-world application. While I didn’t shoot the driveshaft out, I caused some severe Brinelling on the u-joints in my old ’55 Chevy. That car was a 383 sbc with a four-speed. I caught the issue before they completely let go. High torque in heavy cars is a brutal combination.
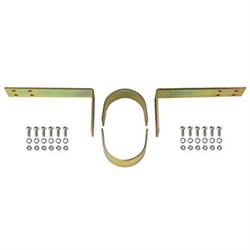
I started with the Speedway Universal fit kit. One of my favorite things to remind friends and customers who buy universal parts is that they, by design, don’t actually fit anything. There are kits designed and built to bolt into specific vehicles. If you so desire, the work has already been done for you and you can pay a little extra for a bolt-in solution.
That being said, I was able to make this kit work. Things that you’ll notice right away. The 180-degree bent pieces of the strap aren’t 180 degrees. More “V” shaped than “U” shaped. I found that I was able to loosely bolt the 90-degree legs to the two halves of the loop itself and pull the bends into compliance. The second thing you’ll notice as you assemble the parts is that the edges are frighteningly sharp.
I wanted my loop to nest up in the driveshaft tunnel, tight at the top. I also wanted it to butt up against the floor brace directly behind it. This would be the most compact and strongest location to bolt it in.
In order to achieve this exact location, I needed to bend the straight legs to get the correct engagement depth and the mounting surface. The floor brace in this area isn’t flat from side to side. It curves toward the rear of the car in the middle where it arches over the driveshaft. As it worked out, this was almost exactly 2” of offset. Which allowed the straight straps of the driveshaft loop to bolt to the floor brace and nest right in front of it where the driveshaft passes through. I believe old Bob Ross used to call that a “Happy Accident”. All the same to me, I’ll take all the luck I can get.
I used my bench vice and a big dead-blow hammer to persuade the bends into the flat stock. I made cold bends in this application as opposed to heating the stock to bend it. I’m unsure of the temper on this steel but if it has any, heating it and not cooling it properly will alter the strength. The bends were slight enough that it was a relatively easy alteration.
When I drilled through the floor I took special care to slightly under-size the hole that went through the bottom and oversize the top side hole. This allowed for the use of a short piece of tubing to be inserted in the hole around each bolt to prevent the tightening of the bolts crushing the floor brace or floor pan. Extra-large fender washers were also used on the top side to help spread the working load and shock load if this thing is ever employed as a catcher’s mitt for the driveshaft.
Another happy accident that ended up working out perfect was the bolt spacing for the driveshaft loop and the exhaust hangers I chose to use. Evidently, that is a go-to bolt spacing spec in China.
You’ll notice that I was only able to use three of the four bolt holes per side to secure the loop. This should be plenty sufficient since all the hardware I used was high-strength, fine thread with nylock nuts. That wraps up a piece of equipment that I hope I never have to use.