How to Fix an Oil Line Leak
Everyone needs to have a toy-hauler and a winter ride, right? For me, that vehicle is a 1998 Chevy Blazer LS 4x4 – and while this truck has treated me well, it also has its fair share of problems. One of the current issues that I discovered is the lines that go from the oil filter adapter to the filter housing, which is used because of clearance issues with the front differential, and from the filter housing to the radiator were leaking. Stock, these lines are ½” steel with rubber lines crimped on in places, and every one of these lines was leaking oil from the crimps. After some research, I arrived at the conclusion that I had three options:
Option A) Replace with OEM lines for ~$150
Option B) Replace with aftermarket lines for ~$60 (which are prone to failure in 6 months)
Option C) Make my own lines and eliminate any future worry for ~$180
I don’t know about you, but option C seemed like the pretty obvious winner to me, so I set out to get the supplies.
This was my first time doing anything with AN lines/fittings, so I had to acquire the “AN Essentials” as well as hose and fittings. For the essentials I bought:
Speedway Motors Braided Hose Cutter, part #910-89802
Adjustable AN Wrench, part #910-89805
Bench Vise Fitting Jaws, part #617-3661
For the lines themselves I needed 8 AN8 to ½” tubing fittings, and 8 AN8 hose ends. I wasn’t concerned about colors matching on this vehicle, so I used a combination of:
Earls -8 AN Male 1/2 Inch Tubing Adapter, part #425AT165008ERL
Russell 1/2 Inch Tubing -8 AN Male Flare Adapter, part #617-63923
Earls Straight -8 AN Female Swivel Seal Hose, part #425AT800108ERL
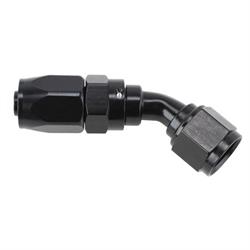
Speedway Full Flow Swivel Hose End Fitting, 45 Degree, part #620-10101
Speedway Stainless Steel Braided Hose Line, part #620-308
Once I got home and got the lines removed from the truck, it was time to get to work.
I got out my angle grinder and cut all of the lines just in front of the crimps where it still measured ½” (being sure to take pictures ahead of time so I could remember how to run the new hoses, of course). I also found it helpful to lay the lines on a spare piece of cardboard, both to absorb the oil that trickled out, and to outline with a sharpie so I could retain the same approximate length when reassembling.
Once all of the lines were cut, I used a variety of files to clean up the tubing so it was smooth, free of any nicks or burrs, and didn’t have any metal flaring out that would make the fittings unable to squeeze over the lines. It is also ideal to keep your cuts as “straight” as possible, i.e. at a 90* angle to the lines to ensure a proper seal. Your last step in preparation should be blowing out all of the lines very thoroughly with compressed air to clear out any metal shavings that may have fallen in during this process.
Before installing the fittings, I have a few things I learned along the way that I’d like to share. My first piece of advice is to use AN wrenches if you would like to keep your fittings scratch-free and looking pretty. These wrenches are made from aluminum and are far less likely to scratch than a typical wrench.
My second piece of advice would be to invest in a set of wrenches instead of using an adjustable one. My adjustable wrench worked well until the fittings started to get tight, at which point it turned into a nightmare. The more I tried to tighten, the more the wrench slipped, and the more the fittings got scratched. Luckily, I’m not too worried about how these look (for those who are ever under the truck to see them, that is). So, I resorted to using 7/8” wrenches that I had laying around and they worked wonderfully (albeit leaving a few scratches).
My third piece of advice would be to have a full-size vise to use with the aluminum fitting jaws. At home I had Speedway Motors Performance Tool 2.5" Drill Press Vice, part #910-81030 which is a great little vise, but the jaws were too small to hold the aluminum ones.
With that out of the way, let’s install some fittings. The Earl’s fittings were very handy as they have one side of the wrench hex printed with their logo. I used this as a guide and tightened all of my fittings to the point where the logos lined up and there was about 1/16” between the two halves of the fittings. You’ll want to make sure as you’re tightening, the steel lines are not backing out. This happened on one of mine and it caused an oddly crushed bushing, which was unusable and I ended up buying a new fitting. Overall, I didn’t have too much trouble with these and the installation should be pretty straight forward. I had the best luck with the steel line pushed just far enough into the bottom half of the fitting to fit the bushing over it and leave about 1/16” of the line exposed above.
The braided hose fittings were a bit trickier, but once you get the hang of it you can get them popped on pretty quickly. To start, I installed a fitting on one end of my length of hose. To do this, you’ll need to take some care to stuff the braids into the fitting. I found it worked best to install the bottom half as straight as possible. Take a little bit of time to tuck in loose braids, and TWIST. You’ll be surprised how many of the braids tuck themselves in with just a couple twists back and forth.
Once the bottom half is on, work the top half into the opening of the hose. Once it’s started in there, you’ll want to lubricate the threads and start twisting the two halves together. Just like the steel lines, you’ll want to take care to make sure the braided hose is not backing out, and also not twisting with the top half as you’re tightening it. I didn’t have any trouble with this, but it’s something to watch for as you won’t have a perfect seal if this happens.
Once your first fitting is installed, I used my outlines on the cardboard to lay everything on and measure where to make my second cut. When cutting your hose, it works best to wrap the area you intend to cut with tape, I used electrical tape. This prevents the braided steel from fraying all over and keeps it manageable to work with. After your first cut, you can install a fitting on each of the new ends you’ve created (after removing the tape, of course) and repeat the process. The more of these that I did, the quicker it went – so don’t get discouraged if your first one takes you awhile.
Once you have all of your lines cut, fittings installed, and everything measured up, it’s time to get it back on the car! I blew everything out with compressed air once more just to be on the safe side, then started to put them in place. I used some 45* fittings, so I mocked them up on my truck and took note of the best angle to make everything fit before tightening them down. After you get everything in place, make sure all of your fittings are tightened down (I missed one, and was met with a stream of oil underneath the first time I started everything up). If everything went well, you should have some flashy new lines that will stay sealed for years to come!