C10 Rear Drop Springs Installation
Awhile back, I had lowered the front of my 1969 C10 pickup. It is just a fun old truck and not something I plan to restore completely, so I took the cheap way out and cut the stock front springs down. It worked pretty well, and to my surprise, it didn’t stiffen the ride up too bad.
The rear was then way up in the air compared to the front. For a short term fix, I used some exhaust clamps to clamp the rear springs down a little. This got the rear down some but not quite where I wanted it yet. Also, the side effect of clamping the rear springs was the back of the truck became very stiff. Rough railroad tracks and potholes became something I started slowing down for considerably.
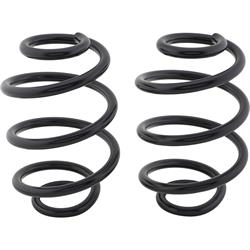
After a month or two of driving on the stiff rear springs, I decided enough was enough and picked up a pair of Speedway Motors 4” Drop Springs. I had also looked over the spring retainers and hardware which had certainly seen better days, so I decided to grab the Pickup Coil Spring Retainers Set as well. With new parts sitting here waiting, there was only one hurdle left to jump…bust loose those rusty nuts!
To start, I used some penetrating oil to soak the threads of the spring retainer nuts and bolts. I sprayed them several times for two days. I didn’t think they stood a chance at coming loose, but in case they do, this will go a long way to making the removal more straightforward.
I used a long ½” drive breaker bar with a ¾” six-point socket to loosen the lower bolts. At first, they didn’t want to budge, but with a little movement back and forth, I eventually got the passenger side bolt to start turning. It wasn’t turning easy, but it was moving. I repeated the same process on the driver side, and after about six or seven tries both loosening and tightening, I went ahead and put some solid pressure on it, which is when the bolt just snapped instantly. After that, I went back to the passenger side, soaked the threads again with penetrating oil, and continued to slowly get it to turn until finally, the bolt made its way completely out. I was beyond amazed that the long bolt didn’t snap off, seeing how rusty it was after removing it.
With the passenger's side lower entirely off and the rear end dropped down to the ground, I went back over to the driver's side. Even though the bolt snapped, the spring still wouldn’t budge. I used a large hammer and beat on the spring and retainer. It started to pull the remains of the bolt out of the control armhole, but progress was slow. Next, I used a punch and hammer to drive the broke bolt out from the bottom. Again, progress was slow, but it started moving more and more with each blow of the hammer until it finally broke free.
Now that the springs were hanging by the upper retainers, I focused my attention on those. I used the same breaker bar and ¾” six-point socket to reach inside the spring to the bolt head. On the top side inside the frame, I used a ¾” box end wrench. I attempted working these back and forth a little like the lower bolts, but they didn’t seem to be budging. When I put some hard pressure on the passenger side bolt, it immediately snapped off. To me, this was excellent news!
With the driver's side upper, I wasn’t so lucky. I’m not sure if I was only partially on the bolt or if it was just in bad shape already, but I ended up with a rounded off bolt head almost instantly. At that point, the only good option I had was the torch. Cutting the upper retainer loose was pretty quick, and possibly the way I would have started the project if I didn’t have to borrow the torch from my neighbor down the street.
After the springs and hardware were removed entirely, there was a considerable amount of rust, scale, dirt, etc. on both the upper and lower spring seats. A chisel, punch, hammer, and grinder made quick work of cleaning up the spring seat areas.
Finally, it was time to start bolting on the new springs. I looked over the hardware that was included with the spring retainers and decided to use one of the supplied flat washers along with one of the larger and thicker original flat washers. The originals were rusted to the bolts, so I opened my vise large enough to let the bolt head pass through and gave them a few hits with a hammer to free them up. The lower spring retainer has the nut welded to it, so I set the spring on top of the control arm with the spring seat in place and bolted the bottom of the springs down loosely.
At this point, I was ready to raise the rear end with a floor jack until the top of the springs just started to touch the frame. I looked at possibly bolting the springs to the frame first, but in the end, this scenario with the bottom of the spring attached first made the upper retainer very easy to attach. I started with both upper and lower retainers loosely assembled, then moved the spring around a bit to get it centered and then finished tightening the hardware.
Now it was finally time to lower the truck down to see what kind of altitude adjustment I had. I jumped up on the back bumper and immediately noticed it was lower. I gave the back of the truck a few bounces and grabbed my tape measure. By eyeball, the truck appeared fairly level. I measured all four corners and came up with 30 ¾” from the ground to the bottom edge of the wheel opening at all four corners, with 235/75R15 tires all the way around.
I am very pleased with the height, ride, and overall look of the truck now. I am going to leave it as-is for a few months and measure again, but I may drop the front another ½”. For now, I love the perfectly polished look!