Adding a Water Bypass Kit to an Intake Manifold
To assist in keeping the rear cylinders running cool in high-performance engines, you can add a water bypass kit to the intake manifold. For my 454 Big Block Chevy, I added an Edelbrock Air Gap Intake Manifold, which is for rectangle port heads. This intake has two 3/8" NPT female threaded ports. One on each side of the back of the intake that match up to the water jackets on the heads.
Most stock intake manifolds won't have these ports already on them. So, if using a stock intake check to see if there are ports, otherwise modification to the intake will be necessary to add the bypass hoses. This Water Bypass Kit I used includes almost everything needed to install on a small block or big block Chevy. You will need to source longer bolts for the thermostat housing since there is a 1" riser going underneath it. Also, depending on variations of intake manifolds, you may need to use a few different fittings then what comes in the kit.
Before removing any plugs, hoses or thermostat housings, you will need to drain the coolant. Once I drained the system, I removed the upper radiator hose and thermostat housing. I then removed the 3/8" NPT plugs on each side of the intake on the back. With the plugs removed, I ran into the first simple change I would have to make. The passenger’s side port was right under the vacuum advance canister on my distributor.
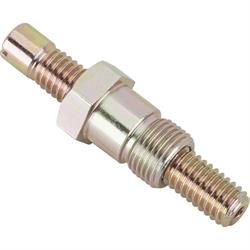
So, I marked "#1 cylinder" on my distributor and pulled it out. I then found the top dead center on the #1 cylinder with the #1 spark plug removed and rotated the engine over using a socket and long ratchet on the center crankshaft bolt. I also used a homemade top dead center indicator that consists of an old spark plug with the ceramic removed and threaded for a long bolt to screw in. Speedway Motors offers this Top Dead Center Indicator for only $5.99.
With the engine on #1 top dead center, I could reposition the distributor so the vacuum canister was out of the way. I used a long flat head screwdriver to rotate the oil pump shaft so the distributor would drop down and seat fully. I then installed the 3/8" NPT male to AN6 male straight fittings into the intake manifold on both sides. From there, I moved to the front and installed the 1" riser under the thermostat housing. I added a gasket to the bottom of the riser and used the O-ring seal from the thermostat housing along with some RTV silicone to seal everything up nicely. I moved the thermostat from the intake manifold to the top of the riser where it was recessed.
I ended up going to my local hardware store and buying some 3/8-16 x 2" long Allen head bolts to fasten everything back down. With this riser in place, I used a 3/8" NPT Male to AN6 Male 90 Degree Fitting for the passenger’s side on the riser, then a 3/8" NPT male to AN6 male straight fitting from the kit on the driver’s side. With all coolant port fittings installed and sealed with ARP Thread Sealer, I could see what AN6 female to 3/8" push-on hose ends I would need to connect the front and back together. I used two 90 degree AN6 to 3/8 push on the hose from the kit for the back, one AN6 female to 3/8" hose straight on the driver’s side front and one AN6 female to 3/8" hose 90 degree on the passenger’s side of the front.
With those fittings screwed on, I held the AN6 hose supplied in the kit in place and cut it to the length I needed. To assemble the hose, I removed the fittings and installed them off of the vehicle. The AN hose and fittings are extremely tight and don't require the use of hose clamps. So, applying some hose assembly lube such as Push-On Hose Fitting Lube from Aeroquip makes this a lot easier. With the hose fully seated on both push-on fittings, I screwed it on to the AN6 male fittings on the front riser and back of the intake. The fitting changes I made gave a nice clean look and no kinks or clearance issues with the bypass hose.


