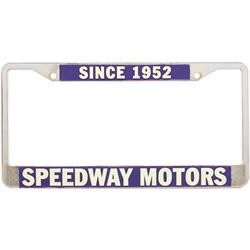
Things To Do With An Unused License Plate Frame
I grew up attending races and car shows so I have a big collection of pins and badges that basically just sit in a drawer. I wanted a way to display them so I figured out how to do it using a license plate frame from the event I spent most of childhood attending; Speed Week at Bonneville.
Supplies you’ll need to make a corkboard:
- Cork tile
- License plate frame
- All-purpose glue
I found the cork material at my local craft store.
Step 1: Mark and Cut Your Cork
A license plate is 12” wide by 6” tall with rounded corners. I made a cardboard template, but cork is so easy to work with, you can just measure out a 12” x 6” rectangle with a ruler and guess at the roundness of the corners.
Step 2: Test Fit Your Cork
There are two little pop ups at the bottom of the frame to help hold a plate in place. The cork was too thick to slide under these pop ups, so I just cut the cork to fit around them.
Step 3: It’s Glue Time
I chose E6000, an industrial strength adhesive. It works on metal, wood and plastic. I spread the glue on the back of the frame and then pressed the cork into place. Then I put the whole thing under a stack of catalogs to cure for a few hours.
And tah-dah! This neat little cork board can hold your race badges and show pins, or even your to-do notes for your latest car build.
I love figuring out alternate uses for items. This project came about while I was looking for cork for a similar license plate frame project. It’s such a cute idea and can be super handy for your desk or workbench.
Supplies you’ll need to make a whiteboard:
- Metal sheet (preferably galvanized steel)
- Roll of Dry Erase Contact Paper
- License plate frame
- All-purpose glue
The galvanized steel I chose is magnetic AND works with dry erase markers. But the polished finish of my license plate frame looked too good to clash with the galvanized metal. So, I chose to use Dry Erase Contact paper for this project as well.
Step 1: Mark Your Metal
A license plate is 12” wide by 6” tall with rounded corners. The license plate frame I have will hold a plate and matches its stock bolt holes. I made a template out of cardboard, but it’s not necessary. You can easily measure out a 12” x 6” rectangle on your sheet of metal using a ruler and marker, and guess at the rounded corners.
Step 2: Cut to Size
You can cut your metal sheet with a band saw or a metal bending brake. Since my sheet of galvanized steel wasn’t very thick, I used tin snips to round off the corners and make the long straight cut. Make sure you wear protective work gloves while you handle the metal. The edges can be sharp and unfriendly. In fact, the edges were so unfriendly that I chose to file them with a flat file. I held the metal sheet between two rags in my bench vise and filed the edges smooth with a flat file.
Step 3: Test Fit
To ensure that everything was going according to plan, I popped the cut metal into the license plate frame to make sure it fit. The frame has two little pop ups at the bottom to help hold a plate in place. The metal fit perfectly.
Step 4: Install Dry Erase Contact Paper
The dry erase paper came in a roll, so I cut enough material from the roll to cover my plate. I removed the backing and laid the edge of paper onto one side of the plate. I slowly finished laying down the contact paper using a felt squeegee to smooth the material onto the plate. You can use the side of your fist too. Then I turned the plate over and trimmed the excess material using an exacto knife.
Step 5: Glue It All Together
I used E6000, an industrial strength glue, because it adheres to metal. After slathering the frame with glue, I pressed the metal plate into position. Then I placed the whole thing under a stack of catalogs for a few hours to cure.
And now we have a handy (and really kind of adorable) dry erase board for your garage, office, kitchen… it can be used anywhere!
