How To Crimp Spark Plug Wires and Install Boots
Cutting and Crimping Your Own Plug Wires Makes for Clean and Satisfying Spark Plug Wire Routing
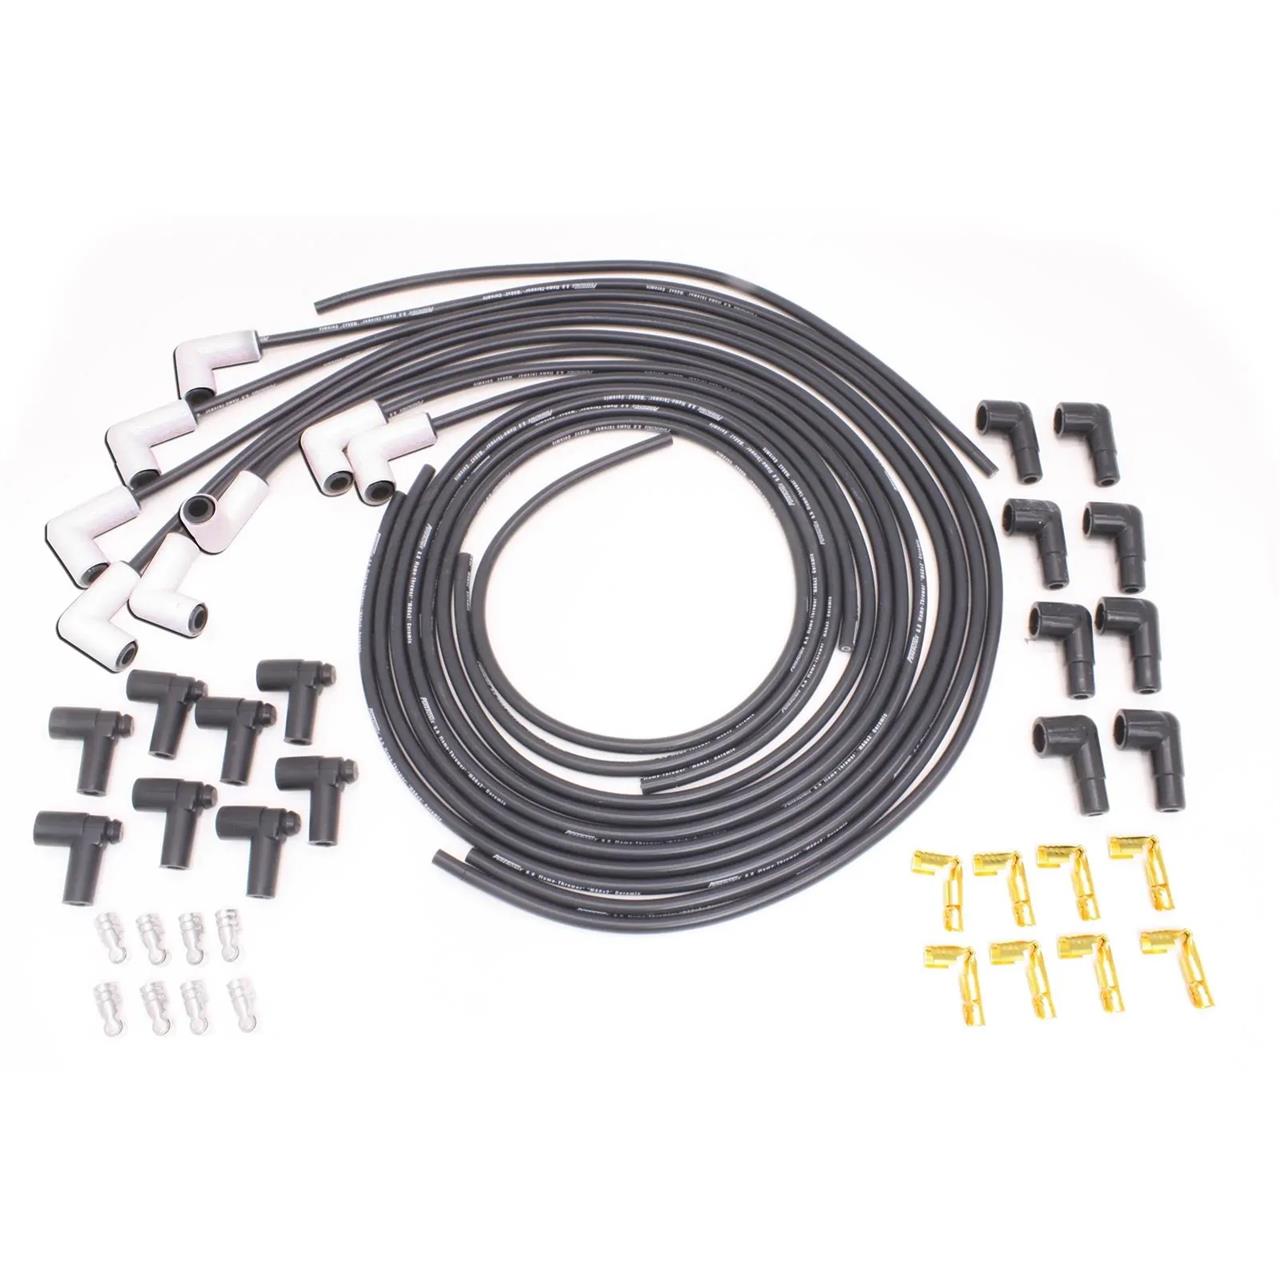
You've put a lot of time, money, and effort into building a powerful engine for your project and now that it's down on the mounts and you're getting everything wired up it is time to consider your ignition system and running new plug wires. While many people will decide to simply buy pre-terminated plug wire kits that say they fit a specific year range of Ford or GM engines, the truth of the matter is, these wire kits are semi-universal. Sure, they'll fit, but they may not have just the wire length you're looking for to produce a clean installation. This is especially true if you are deviating from the factory plug wire routing (going around the valve cover now instead of over it for example). It is this very reason we highly recommend building your own custom spark plug wires. You can purchase bulk wire and the applicable terminals and boots to create your spark plug wires from scratch, or you can buy the universal semi-terminated kits offered by many manufacturers that come terminated at the spark plug end and all you have to do is cut the wire to length at the distributor cap end and install the appropriate terminal. Either way you are guaranteed to have the perfect spark plug wire job when you're done, and people will notice them!
What Tools Are Needed to Properly Crimp Spark Plug Wires?
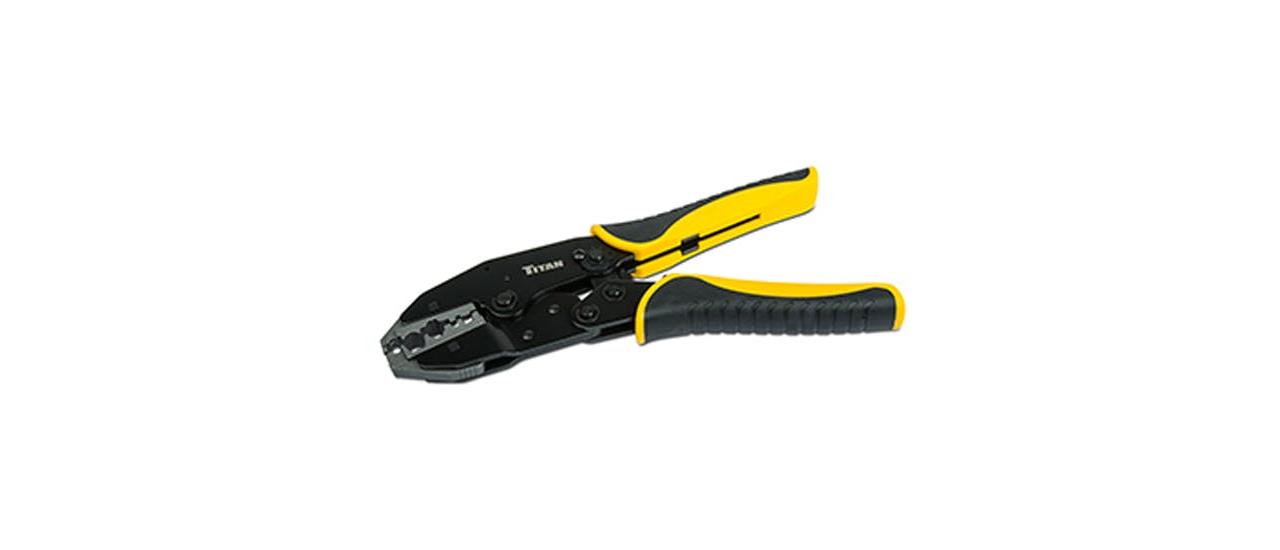
Building a properly functioning spark plug wire begins with the crimp between the wire terminal and the spark plug wire itself. To do this you will need to utilize a crimping tool. There are several different crimping tools offered by Speedway Motors, but by far our favorites are the ratcheting crimpers that utilize replaceable jaws like the Titan Tools version shown here. This way you can use the tool for other wiring projects and terminal types by simply swapping the jaws out. For our wire build we'll be using the MSD Pro Crimp tool we already have in our tool box.

While some of the crimping tools we mentioned include a spark plug wire stripping function, we're partial to stand alone wire strippers designed strictly for spark plug wires. Speedway Motors carries the MSD Mini Stripper tool and the Pertronix Spark Plug Wire Stripping Tool (shown here).
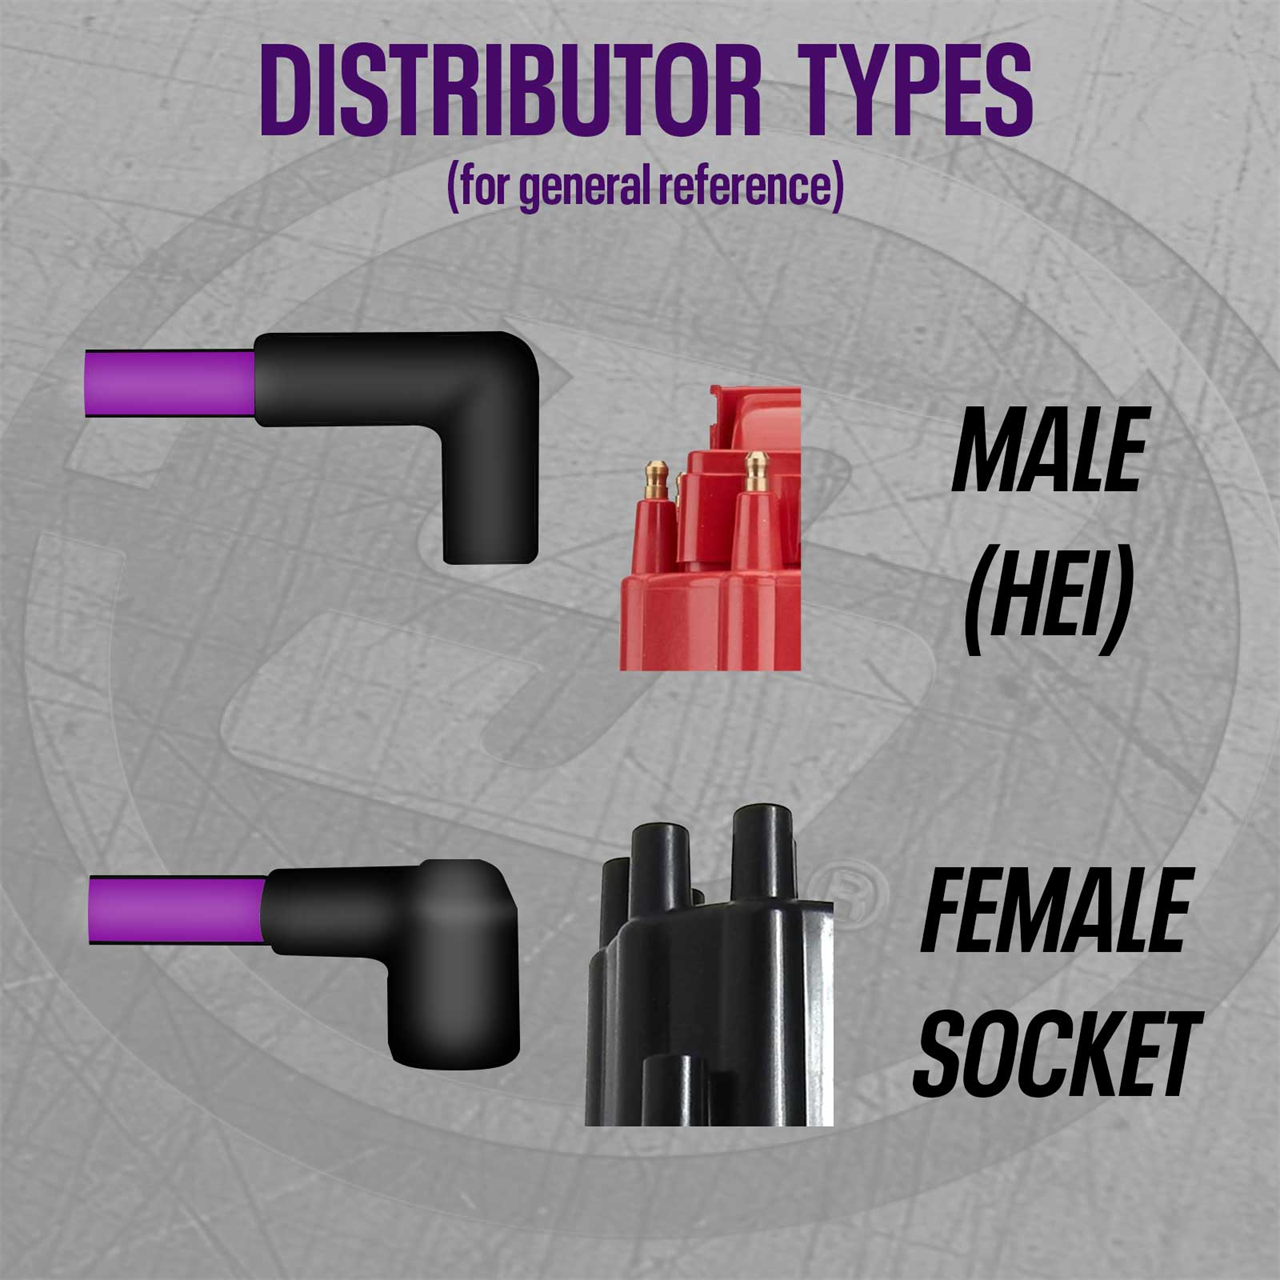
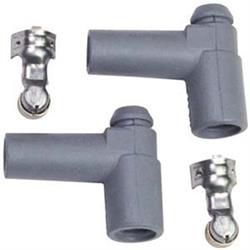
We installed plug boots and terminal ends that are used for socket style distributor caps. However, this procedure will be similar with HEI and other variety of different cable ends, be it at the spark plug end or distributor cap/coil end.

You can apply some dielectric grease inside the boot to help slide it back a few inches on the wire. Doing this step first will save you the hassle of trying to install the boot after the terminal has been installed.
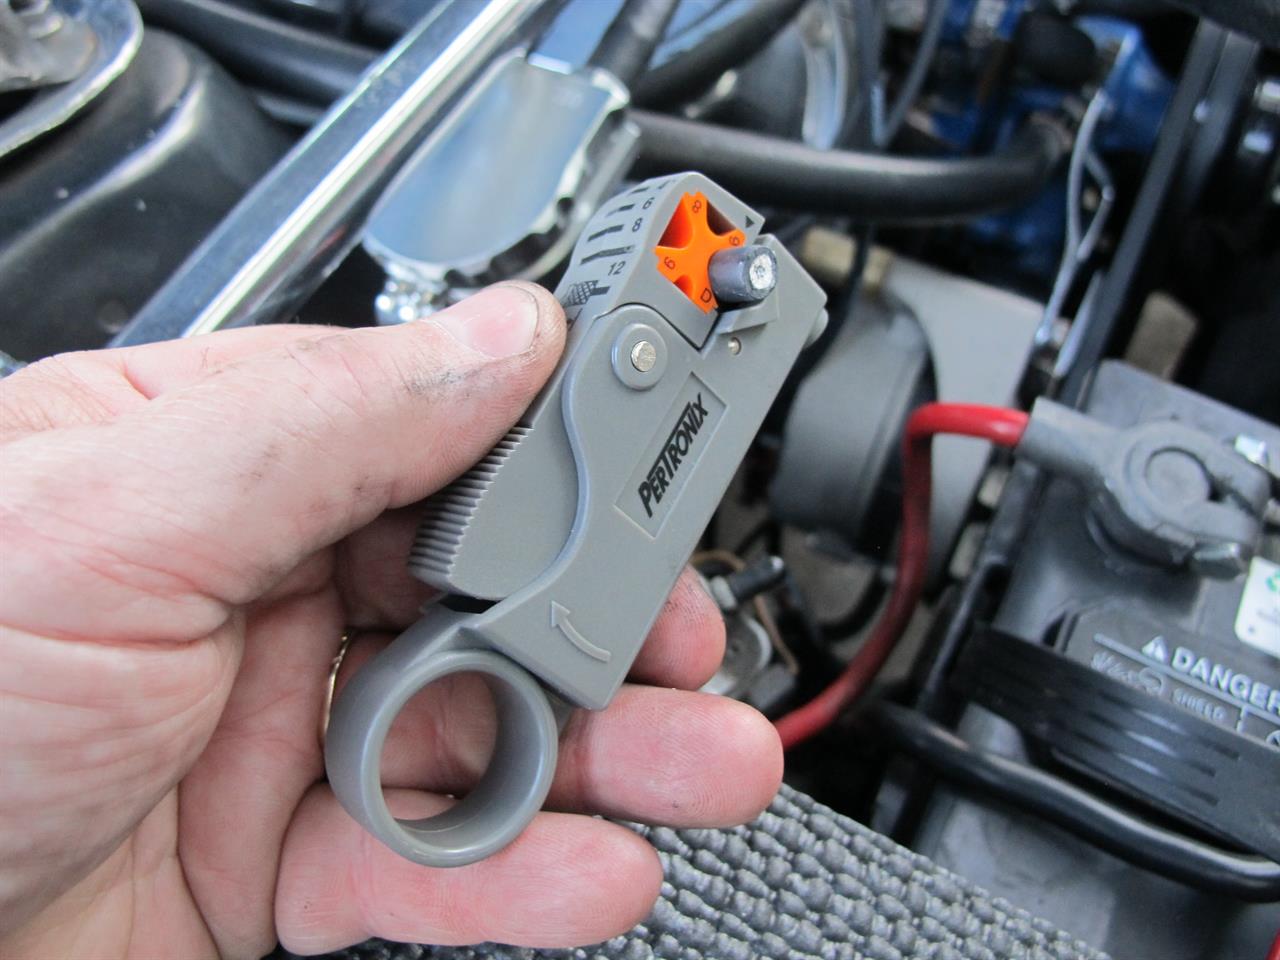
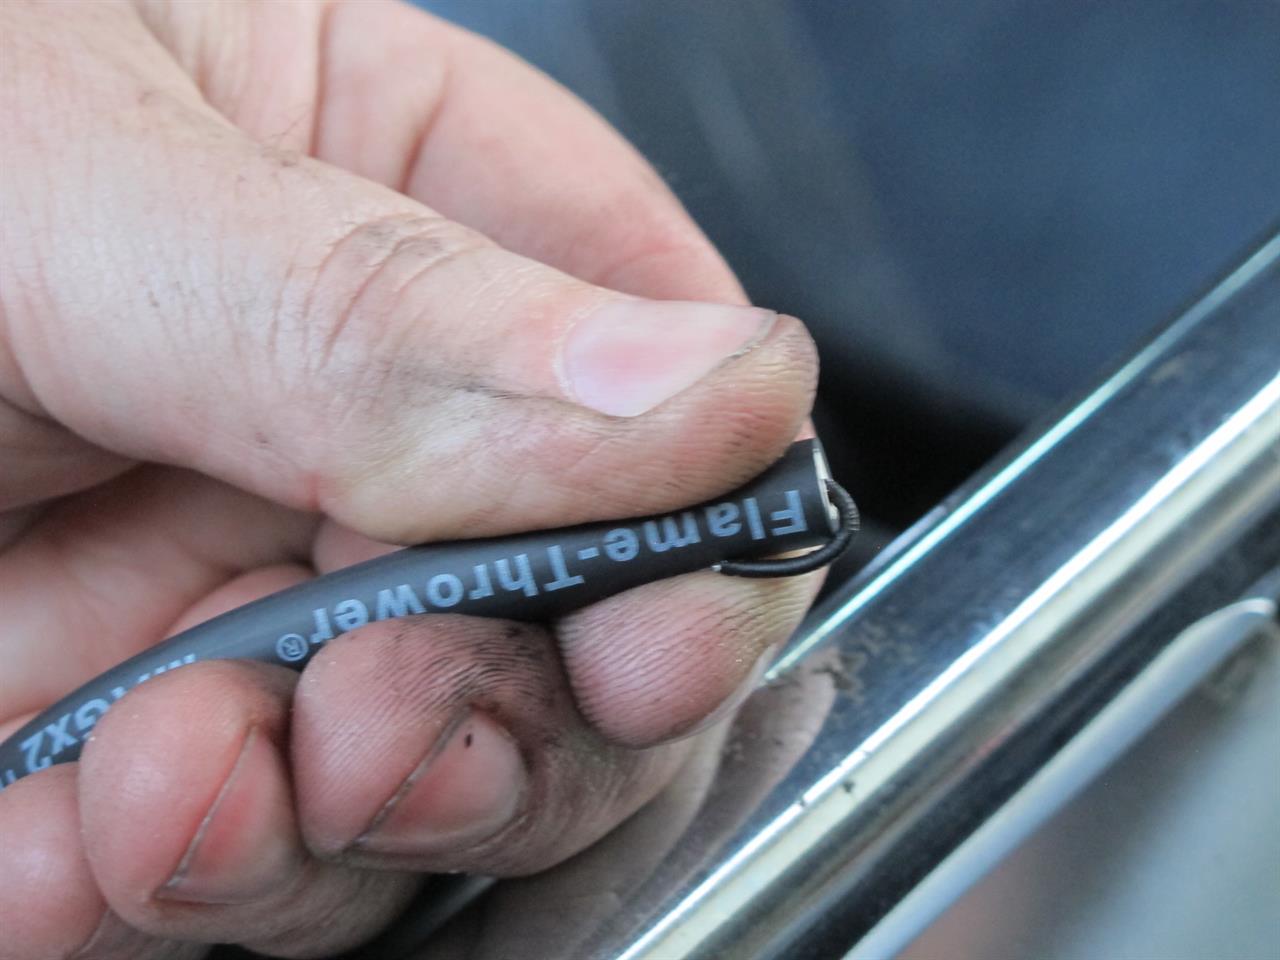
Strip the outer silicone layer, leaving about ¾-inch to 1-inch of conductor wire visible for single crimp terminals. You will need less conductor length for terminals with dual crimps (one for the silicone jacket and one for the conductor itself). The Pertronix stripper makes quick and easy work of this task.

Here we have the spark plug wire stripped and ready for crimping. If you have any stray insulation or silicone jacket material you can use a razor blade to carefully trim any excess strands away.
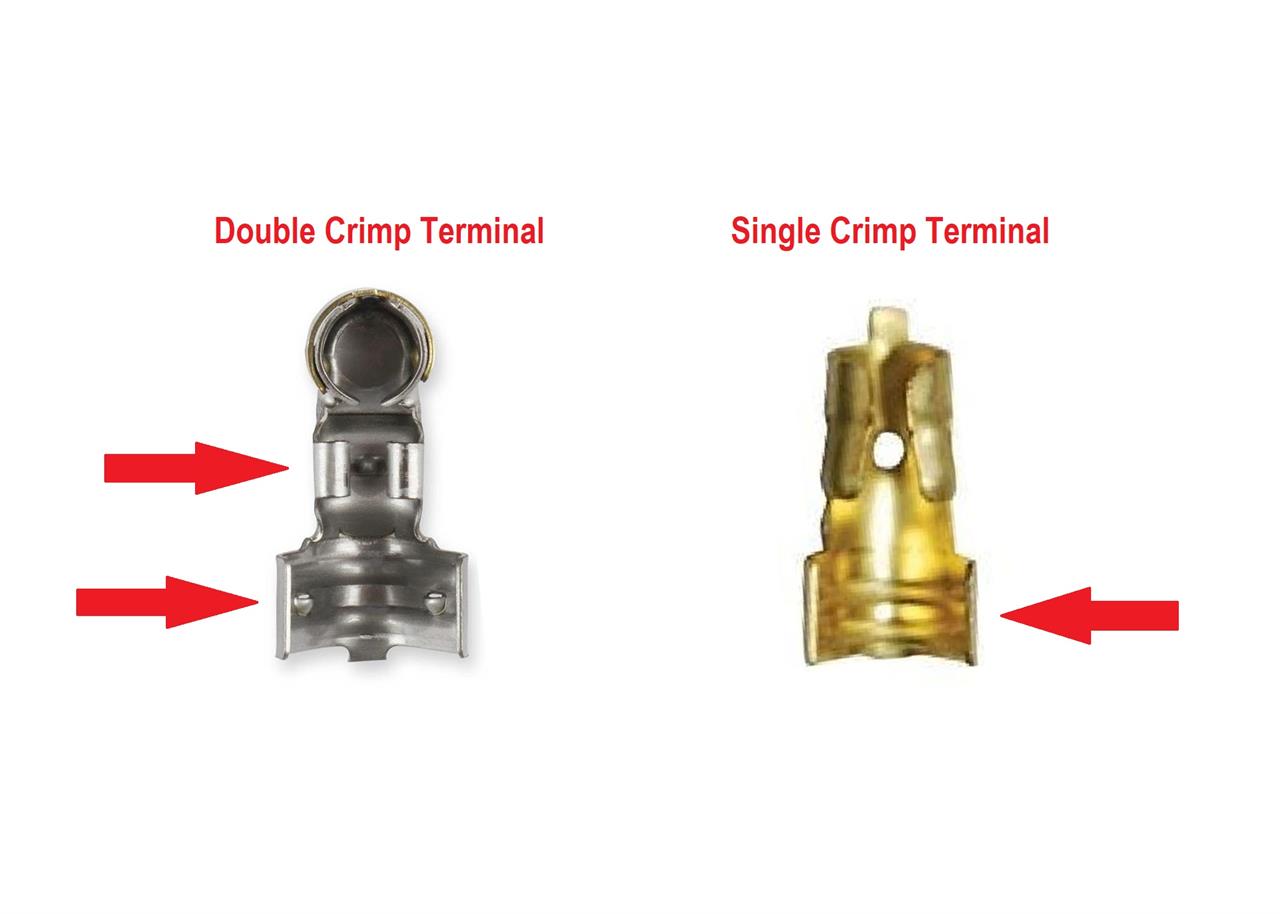
Are My Spark Plug Wire Terminals Single Crimp or Double Crimp?
Generally speaking, traditional socket-style spark plug terminals are going to be brass in color and a single crimp design, where the spark plug wire conductor is folded back and crimped with the silicone jacket in one step. Double crimp terminals are usually found in modern HEI-style terminals and at the spark plug end of the wire as well. These terminals are usually silver in color and require the conductor and silicone jacket to be crimped under separate sections of the terminal body. A closer look at the two terminal types is provided below.
For single crimp terminals fold the conductor back over the silicone jacket as shown here. While holding the conductor in place, slip the terminal over the conductor wire and position it inside the saddle of the terminal. This will help prevent the wire from springing out.

Slide the wire and terminal into your crimp tool and squeeze firmly until the terminal tabs are folded over securely crimped to the spark plug wire.
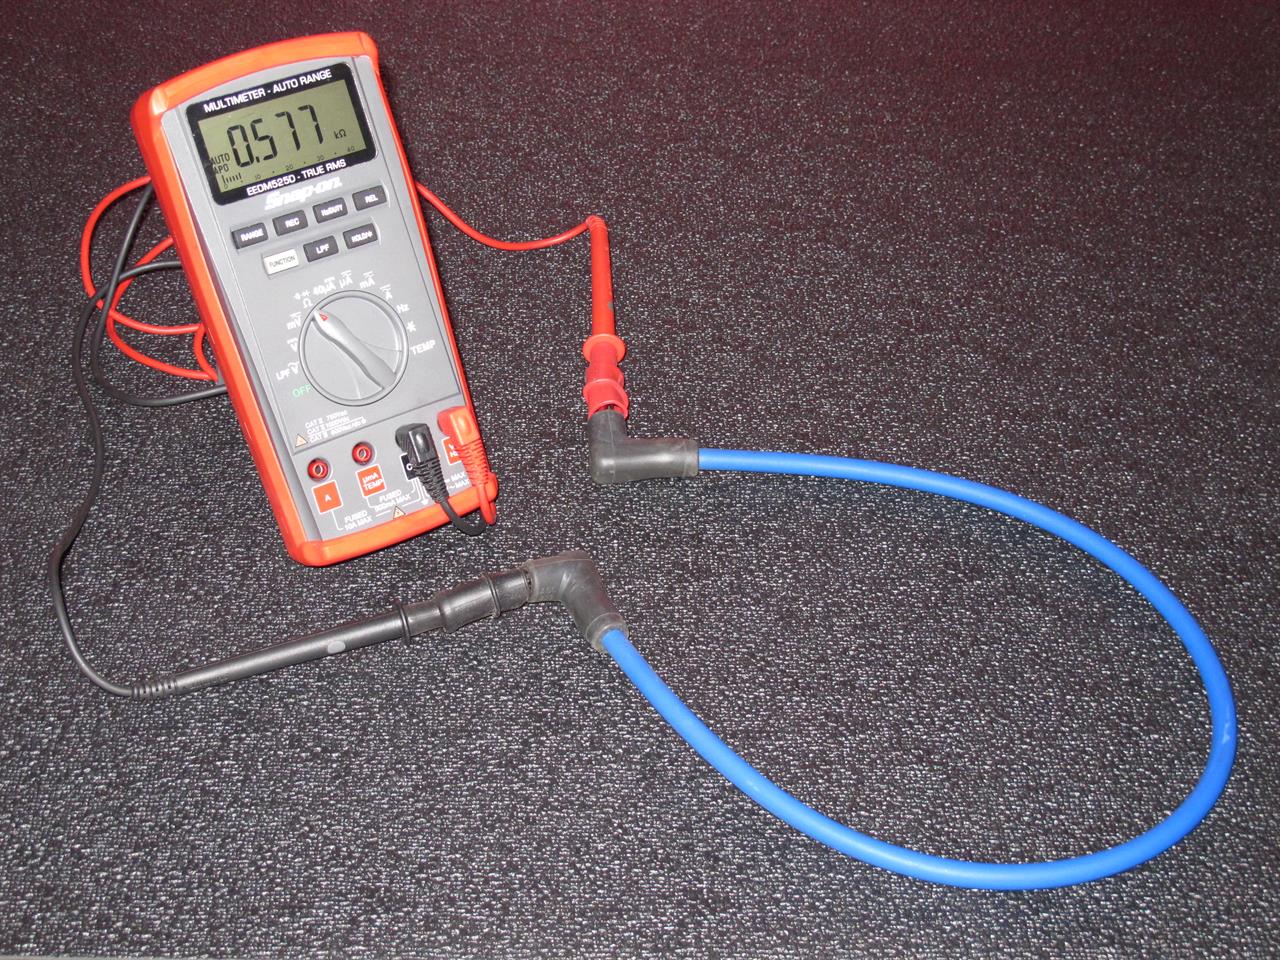
Check to make sure you have a solid connection on the cable, this would also be a great time to check the resistance of each wire to ensure you have continuity.

Then simply slide the boot over the terminal end and repeat each step.

For double crimp spark plug wire terminals the measuring and stripping aspects of the spark plug wire are the same (though you will need a bit less length on the conductor), but you will now have two separate crimping operations to perform for each terminal. The conductor is crimped in the smaller crimp area, while the silicone jacket is crimped under the larger crimp area. It does not matter which one you do first, though we prefer to crimp the silicone jacket first, then the conductor.
Now that you understand all the steps to building your own custom plug wires you may have additional questions on what spark plug wires to purchase. If you're confused about conductor type, wire size, and other factors, then visit our Spark Plug Wire Buyer's Guide to learn more!
If you're a more visual learner, don't worry, we're here to help in any way we can. Which is why we linked to this great MSD video on spark plug wire replacement, which includes measuring, stripping, and crimping of the wire and terminal assembly for both single and double crimp style terminals!
Updated by Mark Houlahan