Converting a Hardwired Sinclair Sign to Plug-In
Most car folks are also collectors of automotive memorabilia. I’m no different as I happily fill my walls with my hobby.
I found this 2’x3’ Sinclair box sign at the Wahoo swap meet in the Spring of 2017. It was love at first sight.
I love the history of these things. It’s simply amazing that such items still exist. It was taken down from an old Sinclair station, somehow missed the scrap yard and was squirreled away by someone with a vision. Just like my hot rod, this sign has a soul quality to it. Now that it’s found it’s forever home, my hope is to bring it back to life by converting it from a hard-wired light fixture to a regular plug-in type outlet, so I can hang it in my garage.
First, I removed three machine screws along the side and carefully slid the plastic form out from the frame. The plastic form was sturdier than I had guessed. I assumed that it would be brittle from years out in the sun and weather, but it acted very strong. It needed a good wash with warm soapy water.
The wiring was strung through a hole in the back. These would originally have been hardwired into an electrical source. It already had a green ground wire attached to a galvanized electrical box next to the ballast.
I bought a washing machine wiring kit from the local hardware store. No specific reason, other than I wanted it to have a ground wire. Plus, it’s already black. I retrieved my little wiring kit from my hot rod, which I bought from Speedway. It has everything you might need for a small electrical project, which is why I typically keep it in the coupe for road trips.
Here are the steps:
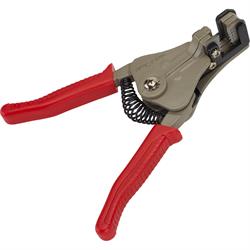
1. Separate and strip the wires.
Using a wire stripper, I stripped about 1/4” of plastic off the copper wire and twisted the ends of the wires together. I bought a pair of automatic wire strippers some time ago and it was well worth the money. They make stripping wires a breeze. You work hard and deserve one.
2. Connect all the wires.
I matched the green wire with a green wire, twisted the ends together and screwed on a yellow wire nut. Then did the same with the white wires and then the black wires. Three colors of wire, three wire nuts. If I had too much bare copper wire, I trimmed the ends with wire cutters, re-twisted the ends together and screwed on the wire nut. I made sure there was no bare copper wire visible.
3. Insert light bulbs.
This fixture holds two fluorescent tube bulbs (F36T12/CW/HO).
4. Plug it in.
Aaaand nothing. I rechecked my wire nuts to make sure I had good connections and then determined the old ballast was bad.
Replacing the ballast:
Honestly, replacing the ballast was starting to get over my head. I would now have to rewire each lamp terminal in parallel. This means a single wire is used for a connection from the ballast to each of the lamp terminals.
The new electronic ballast is much lighter, more efficient and starts instantly. And the new ballast also includes a wiring diagram on its label. The wires were different colors so I couldn’t just play a match game this go around. After some research, I pulled the sign apart further and removed the old ballast wiring.
Here’s the wiring diagram I followed:
I stripped the new wires and hooked them together using yellow wire nuts. At this point, I was just trying to get everything to work. And it did. Notice the look on my face? I was so very happy. And please I had figured it out.
Now that I know it works, the project could be finished. I could wrap the wire nuts with black electrical tape, slap the box back together and be onto the next unfinished project. But I’m a fussy person.
5. Unplug it and undo one set of wires at a time.
Throw away the used yellow wire nuts; once they’ve been used, they’re no good anymore.
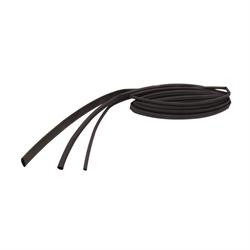
6. Shrink Tube the small wires.
Snake small diameter shrink tubing onto one set of wires. These little shrink tubes will protect the individual wire connections. Choose a shrink tube which will hold two to three wires plus a butt connector.
8. Did you say butt connector?
Oh, yes. Re-twist the exposed copper of your blue wire. Poke it into one side of a butt connector (I chose a 22-16 gauge connector, which is red). Crimp the end with a set of wire crimpers. Try to wiggle it. It shouldn’t act loose. If it does, the crimp wasn’t good enough and you should try again. Sometimes you’ll need to toss your butt connector and start over. Now re-twist the exposed copper on your other wire, poke it into the other side of the butt connector and crimp it as well.
9. Shrink your tubes.
I centered the shrink tube over the butt connector and heated it into place with a heat gun. I now had clean and protected connections.
10. Keep going.
Redo all the other connections with butt connectors and shrink tube.
11. Bundle and wire tie your wires.
Just to make sure the wires don’t flop around inside the sign.
I assembled the power cables with butt connectors and shrink tubing after tucking it through a hole at the bottom of the sign.
I put the sign back together again – slid the plastic back into place and replaced the metal screws to hold the aluminum panels together. And TA DAH! The garage has a little bit more character.