Boxing Stamped Steel Control Arms
I think everyone can agree that there is one thing that classic cars are not, cheap! Like me, I’m sure you’re always looking for a way to save a couple of bucks on your projects while still improving the overall quality. I’m also sure like me, you have more time than money. Well, I decided to use all that time to good use, I knew I was going to be renewing the front suspension on my Comet. I knew there were options available to replace the existing control arms with nice tubular replacements. However, these pieces were just out my price range so I wanted to strengthen my set up on the cheap. I turned to the days of old, so to speak, in the 60’s lots of components like this didn’t exist and weren’t readily available if they did. So, what was the local hot rodder to do? He improvised, he knew that stamped steel designs while being cost-effective, had some inherent strength issues. Under hard cornering or harsh suspension compression, from wheelies, of course, the stamped design allowed the control arm to flex and bend causing possible breakage. Their fix, which I never see anyone do anymore, was boxing the control arms. Welding plates to the bottoms side of the control arm, “boxing” it in, increasing the rigidity of the control arms, greatly reducing flex. So, following the ways of old, I decided to do the same.
I started with new control arms and took the outside flange to the wire wheel to clean off the paint and expose the metal.
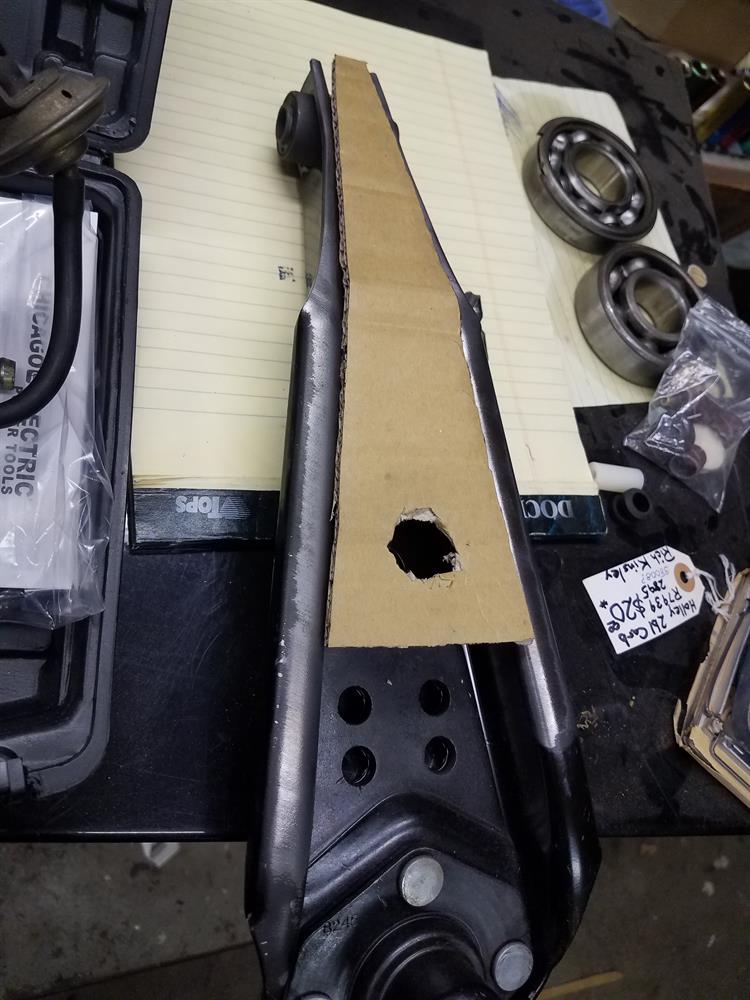
Next, I grabbed a piece of cardboard and mocked up a rough shape that the boxing plate would need to be. I didn’t want to cover the mounting holes for the strut rod and they would obviously need to be accessed. I did, however, make a 1-1/8” hole for the sway bar link mount. This should allow me to install the sway bar link quite easily.
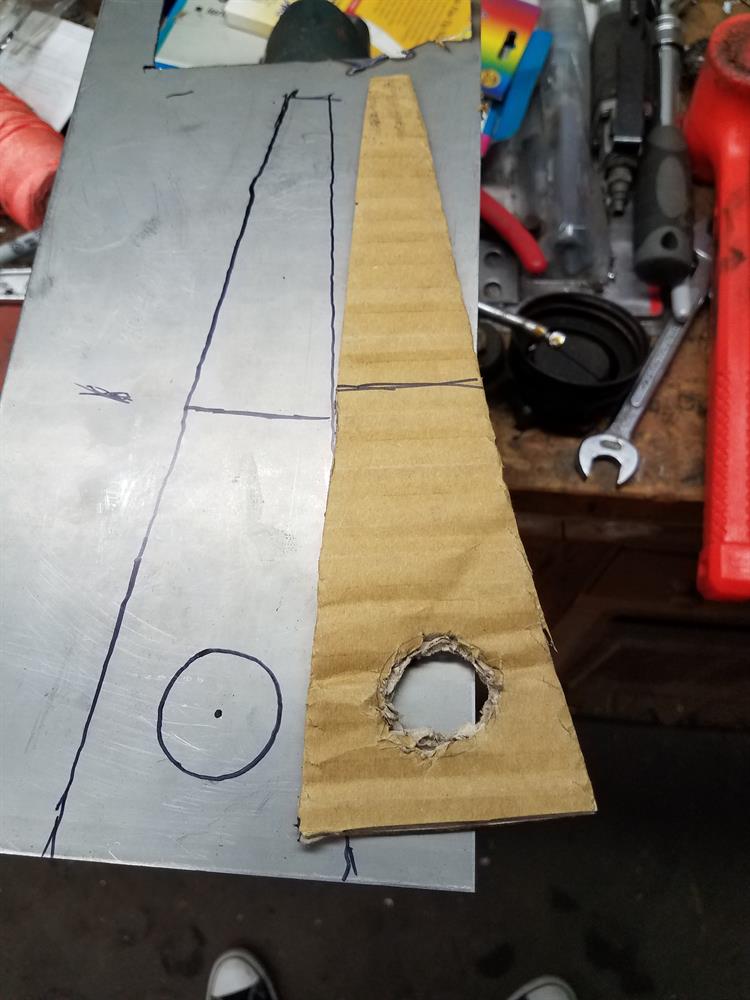
I then transferred this template over to a piece of 16ga mild steel and cut out the piece. Then I took it to the drill and using the metal hole saw blades, I cut the 1-1/8” hole in the plate for the sway bar link. I then bent the plate to match the bend in the control arm and my prep was complete. I tacked the plate in place and then stitch welded the plate on, giving adequate time to allow the metal to cool between welds.
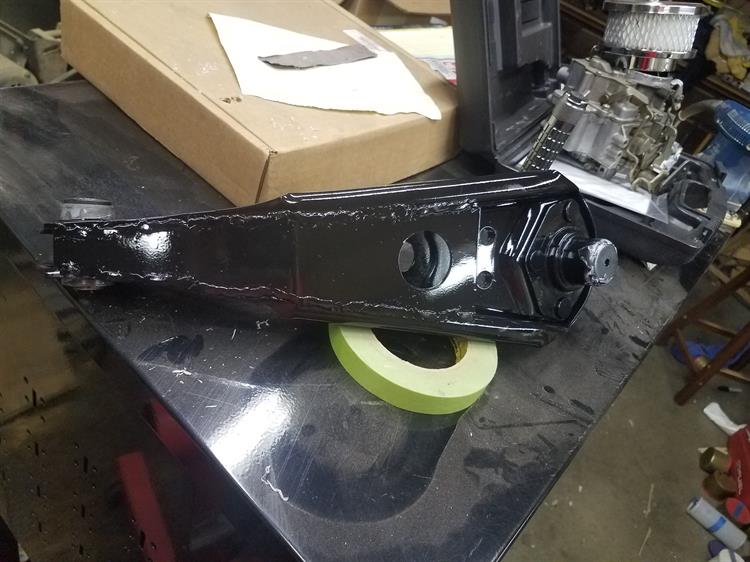
After the welding was done I once again allowed everything to completely cool, I cleaned up the welds as best I could we a wire wheel and scotchbrite’d the rest of the control arm to prep for paint. I cleaned it all with some wax and grease remover. Then, I hit it with black paint, and bottoms were done.
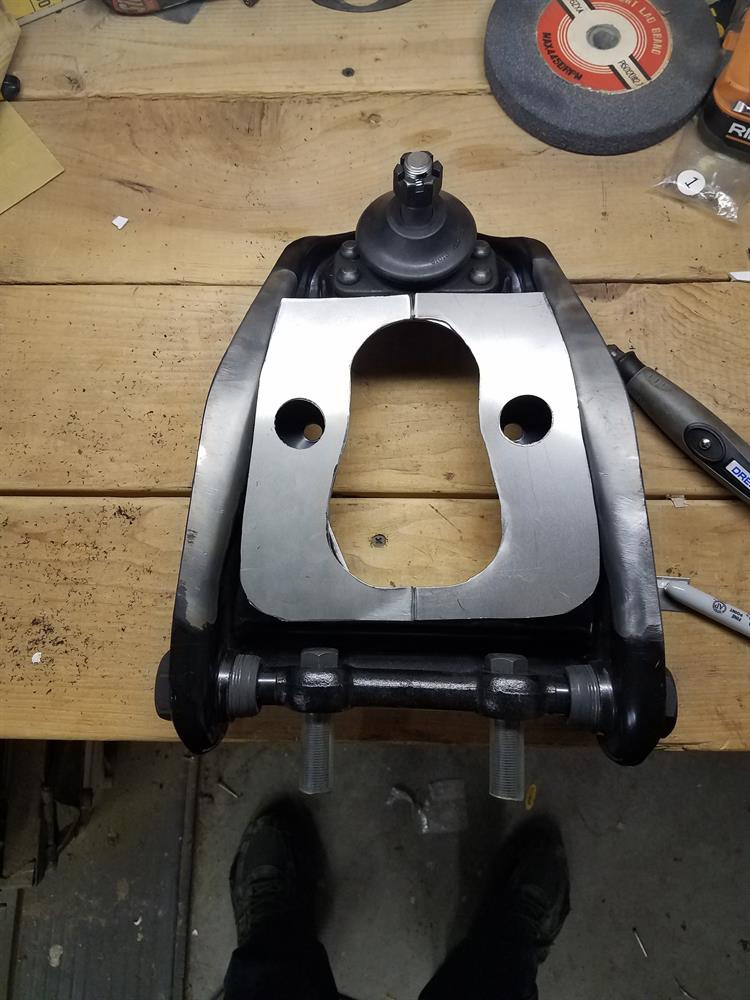
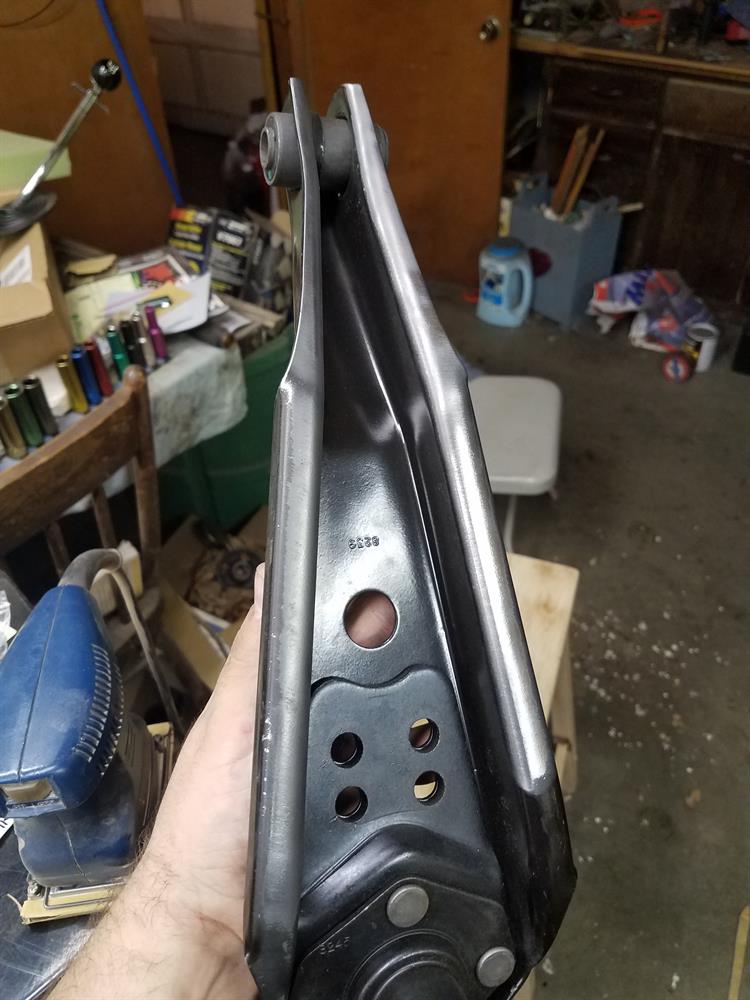
Upper control arms were next, these were a little bit harder as I was working on a 62’ Comet, (similar to the 64’-66’ Mustang), the center of the control arm is cut out for the upper spring perch that rotates on a pivot point. Well, that also happens to be the lower mount for my shock, making it much harder to make a boxing plate that will work and still have access to all the mounting points for the attaching hardware. I decided to make a split style plate that would leave the center of the control arm the same but attach from the center hole to the outside edge, still reinforcing the control arm but allowing me to easily install and remove the attaching components. I once again started with a cardboard template that I transferred to 16ga steel. I would be covering the hole for the spring perches going this route and decided to drill a 1” hole. I then placed the plate on the control arm and started to apply pressure. Being 16ga it will bend with some force but would retain its shape after being bent into place.
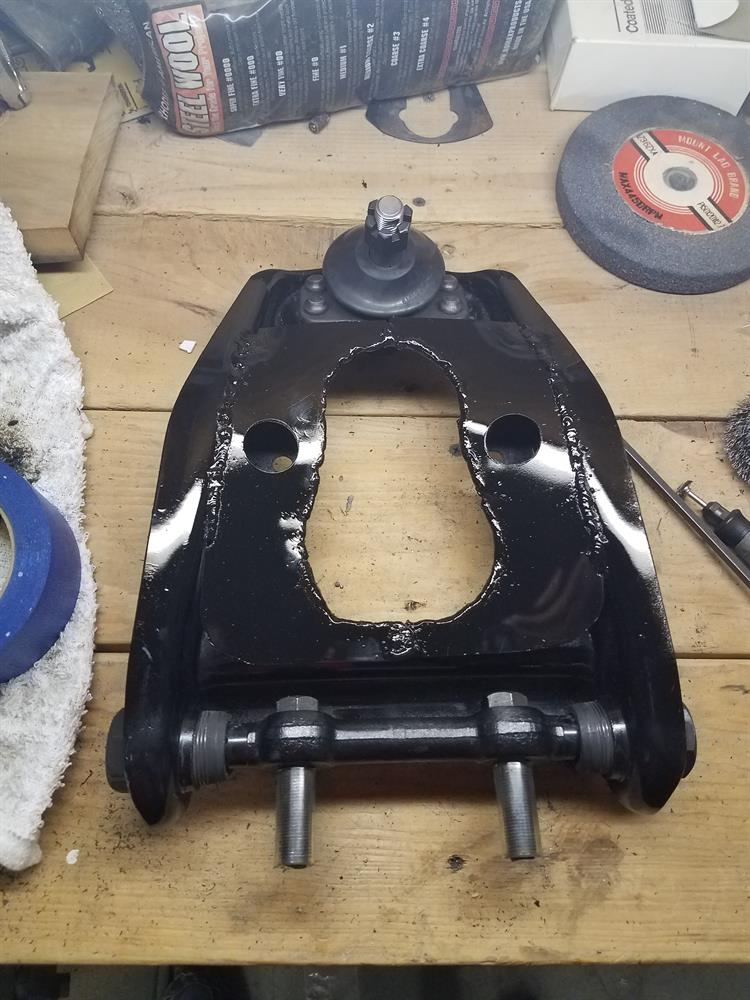
After getting the plate to what I felt was a good shape I cleaned both the outside edge and inside where the center hole is, I also beveled the inside edge of the plate so I can well the two plates together when I get them in. I tacked the inside edge and outside edge up to where the arm angled downward again and stitch welded it in place then after it was adequately secured I used a light deadblow and hammered just the one corner down to meet the arm and welded the last little bit. I repeat for the other side and weld the two together. I once again scotchbrite the control arm and clean with wax and grease remover and then paint black. The results look great! The control arms are stronger and not noticeably heavier than originals. They bolt on just the same and installing attaching hardware was a breeze.
The best part about this modification is it can be done to any stamped control arm new or old. Obviously, this project changes from vehicle to vehicle, but the process is the same, figure out what can be covered and what needs access. Make a template, cardboard usually works best, make sure that the access holes are big enough not only to install your nut or bolt but also for the socket used to install them. Cut out the template and transfer it to the metal. Cut out the metal and test fit it onto the piece, do any final clearancing or modification now. Clean the control arm where the welds will take place. Tack the plate in place and them stitch weld the plate on. Do final clean up. Sand and paint if you want. Reinstall and away you go.

