'55 Chevy Chassis Refresh
If you’ve been following along with Derek Turner’s 55 Chevy Bel-Air build, last time we learned about how a blown head gasket led to a complete teardown and overhaul of the car. He replaced the rusted-out floor and trunk pans, repaired the quarter panels, and matched the 50-year-old paint as best he could. The result was a rock-solid body with a durable coating of bedliner underneath that will ensure it stays that way. It would have been such a shame to put the body back on the crusty old frame, so the old, “while we are at it” rational won again.
Almost a decade ago, when Derek got the car running and back on the road, he replaced the worn suspension components and brakes for safety. Since the car had been driven thousands and thousands of miles this was a perfect opportunity to tear it all the way down and start fresh. Derek pulled off the front clip, removed the old wiring, and lifted the body off the frame. After the frame was completely disassembled, he power-washed 65 years’ worth of dirt and grease off before making a few repairs he had been wanting to do. Our Speedway Motor’s transmission crossmember kit works great, however, we took this opportunity to weld the mounting tabs onto the frame rather than use bolts. This makes for easy disassembly in the event the transmission needs to come back out. Another improvement was reinforcing the side motor mount conversion by welding them to the frame. Before taking the frame to the local sandblaster, Derek trimmed all the unneeded factory exhaust brackets for a clean look.
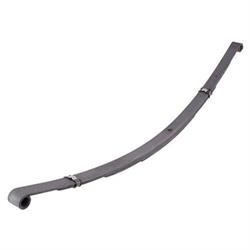
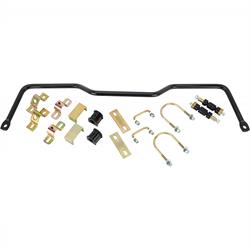
Keeping with the same “drive the wheels off of it” approach, Derek had the frame and suspension components powder coated satin black so that everything is bulletproof. A new set of CPP upper control arms (part number 91085557) were chosen to replace the stock units. He rebuilt the lower control arms with new bushings and ball joints which are held up by a pair of Eaton coil springs. The same CPP power steering box, 2-inch drop spindles, and disc brake kit were cleaned up and reinstalled to get the ’55 frame back on its wheels. Out back, a new set of Posies 3-inch drop leaf springs replaced the cracked and broken originals. Front and rear sway bars, part numbers 113594 and 113253, were added to make the corners a little less dramatic.
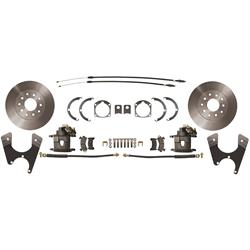
The freshly rebuilt small block was all ready to go, so next, Derek needed to select a transmission. The car had always been propelled by a TH350, however, Derek has been wanting overdrive for a long time. This was the perfect opportunity to enlist Derek’s friend Corey Petska, of Gary’s Hydro’s, to build him a stout 700r4 for the car. The new motor and trans were bolted together and set into the freshly built frame, but now what to do about a rear end? The ’55 has always had an open rear with 3.08 gears, but “while he was at it” Derek decided it was time to track down a positraction third member. He scored an original “P” case that had a factory posi unit in it. After a quick rebuild, the third member was installed into the freshly powder coated housing and a rear disc brake kit was installed and the chassis was ready to have the body dropped back on!
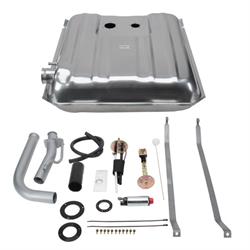
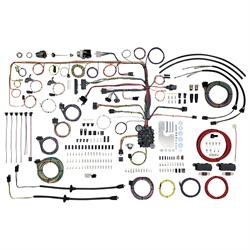
When building a car there are certain milestones that stand apart from others. Firing an engine for the first time, your first trip around the block, or maybe even your first burnout. Another one at the top of the list is putting the body back onto your finished frame. Once Derek reunited the now rust-free body with it’s chassis it really began to look like a car again. Seeing the freshly painted metal flake firewall behind that killer small block was the best motivation one could have to kick it in high gear and get the rest of the car finished. A new Tanks Inc. fuel tank with an internal electric fuel pump was installed and plumbed using Speedway aluminum fuel line and a Mallory bypass fuel pressure regulator. After bolting the front sheet metal back on the car, Derek began installed a new American Autowire harness. This was the perfect choice as it has all the perks of a factory fit harness along with modern upgrades like blade style fuses, a heavy-duty charging system circuit and provisions for electric fans and fuel pump.
It’s amazing what you can accomplish if you stay focused on a project. Almost six months to the day and there are only a few things to do to the car before he can fire up the new engine and take it on the first drive around the neighborhood. Stay tuned to the Toolbox to see Derek’s ’55 Chevy come to life and hit the streets!