SwissTrax DIY Garage Flooring: Designs, Installation and Review
For some of us, the aesthetic vibe of our garages is more important than inside the house. We spend lots of time in the garage, and there's nothing like a clean and functional space with all the right garage accessories. The bare concrete floor is often one of the first things we want to improve, and a durable garage flooring solution is important. In our shop here at Speedway Motors, we elected SwissTrax garage flooring tiles to cover up our stained concrete floor. Check out the video below to see the full install.
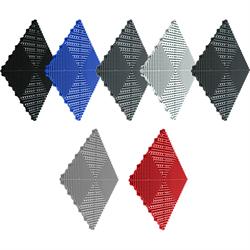
What is Best for Garage Flooring?
There is no one correct answer for DIY garage flooring. Ultimately, you need to be honest with yourself about what your garage or shop will be used for and choose the best garage flooring system to meet your needs. Assuming you’ve properly prepped the surface, just about anything will work in a showroom or cleanroom for final assembly. On the other hand, a fabrication area or garage that you will be parking your daily in and dripping mud and salty slush all over will require something more durable. In our case, or shop will see just about everything, from fab work that includes grinding and welding to final assembly of nice painted parts. After weighing the pros and cons, we chose SwissTrax to keep our floor looking nice without constant refinishing or worry. We're also expecting some ergonomic benefits of a shop floor covered in tiles.
SwissTrax vs. Epoxy
Why did we choose SwissTrax Ribtrax tiles vs. epoxy flooring? There are several reasons to consider alternatives to epoxy floor coatings. First, our shop has been a working shop for a long time, and previously housed a bunch of machine tools. The concrete was deeply stained from cutting fluid and subsequently all the leaky old cars that have passed through our doors. So, any type of rolled-on coating would have required a ton of prep. If all concrete requires prep like acid etching and scrubbing, ours would have been an extreme case. SwissTrax offered an opportunity to forego the drama.
Secondly, we are constantly working back here and tend to be hard on stuff. Swisstrax promises durability and maintainability over an epoxy coating. Your author once spent some time working at a hot rod shop in a bay that had been coated with epoxy. After a year of fabrication work happening on the epoxy, it had all but vanished, leaving bare concrete with a ring of epoxy around the perimeter. Sure, this may be an extreme case, but given the everyday nature of work in our shop, we didn’t want to waste a ton of time prepping and painting epoxy on the floor only to have it fail.
Don’t get us wrong, Swisstrax tiles are not indestructible. But a damaging event can be easily rectified by simply replacing tiles, not repainting an entire floor. We detail that process in the video above as well.
Garage Floors in a Day
One thing that sets SwissTrax apart from a painted-on coating is how easy it is to install. Laying the interlocking garage flooring tiles in our 35’ x 40’ shop could easily have been accomplished in a half day if not for having to move all of our junk around. This stuff literally just falls into place with a gratifying “click” and the only part of the process that really involves care and consideration is when it comes time to cut (more on that later).
SwissTrax Installation
For our install and the making of the above video, we brought in Jeff and Kevin to help us out. These guys have installed SwissTrax a few times in the past and knew the secrets to get the best results. What that meant for us was starting in a corner against the wall and working left to right, completing a row, then starting over on the left side again. We found it very helpful to lay the tiles out in bundles, almost as you would to shingle a roof, and orienting the bundles so the tiles we correctly “clocked,” allowing us to just grab a tile and throw it down, without worrying about orienting the male/female connecting tabs. We quickly established a routine with one installer throwing the properly oriented tile from the bundle into approximate position, another setting it in place properly, followed by a third stepping on the edge to snap it into place. It worked well and went extremely fast. You could absolutely do this by yourself, but a helper or two will make things go much faster.
How to Cut SwissTrax
Turns out, you do not need a specialized SwissTrax tile cutter. The dimensions of our shop required that two rows be cut down where they met the wall. After measuring and marking, we simply attacked the tiles with a circular saw. You’ll want a good, sharp blade, but there is no specialized SwissTrax cutter required. You might also find a table saw with a fence to be extremely helpful for making repeatable cuts.
We had the unique problem of a big “I” beam right in the middle of the shop. As you’ll see in the video, we made some cardboard templates to mark our cut, then used the bandsaw to make the precise cuts necessary. You could use a jig saw here as well. For as tough as this stuff is, we were astonished at how easy it was to cut.
How to Clean SwissTrax Flooring
Mild soap and water works well to clean SwissTrax tiles of normal dust and dirt. Severe spills can be washed out under the tiles with a hose or cleaned up by pulling up tiles in the affected area. Our shop tends to see a lot of metal particles from grinding and drilling, and we’ve found that a quick pass with the vacuum handles this stuff pretty well. Our gray tiles show also show no sign of staining or tracking so far.
Are Garage Flooring Tiles Worth It?
Honestly, we’ve only been living with this in the shop for a few weeks. We promise to update with a full and objective SwissTrax review after a few months. For now, here are some initial impressions.
First, this stuff really does seem to be pretty tough. We’ve been dragging cars around on dollies and floor jacks as well as cutting, grinding, and MIG welding on it and have yet to see any noticeable damage to any tiles. As far as cleanliness goes, our fab area is normally covered in metal debris after a long day of work, but the SwissTrax allows the area to appear clean at all times. We just run the shop vac over the area during our weekly cleaning to pull up the dust and shavings that have fallen through the tiles and it seems to work very well.
Swisstrax Review – 6 Month Update
It’s now been about six months since we installed the Swisstrax DIY garage flooring in our shop. Here’s our honest Swisstrax garage flooring review.
First, the floor still looks great. We’ve actually been surprised by all the comments from visitors to the shop. The Ribtrax tiles really added a professional appearance to our shop/studio space. And visually, the tiles have held up very well. Honestly, they look just as good now as they did when we installed them. You can see for yourself in the video above.
Over the course of our six month “test” period, we finished off our ’68 C10 project, which means we spent a whole lot of time in the shop, working on and living with our Swisstrax floor. Here are a few observations made during our truck assembly thrash session.
Let’s get to the negatives first. Honestly, there’s really only one, and that’s the obvious fact that every once in a while you will lose something through the grooves in the floor. Tiny fasteners like #10 machine screws and ¼”-and smaller washers are especially likely to disappear. It doesn’t happen often, but it happens. Once you get through your initial frustration, it only takes a minute to pop a corner of the tile up and retrieve your lost hardware.
And now to the positives.. The big one is that this stuff really is tough. We did a bunch of MIG welding on our tiles. We blasted them with sparks from abrasive cutoff wheels. We spilled nasty stuff on them. We got paint overspray on them, then wiped them with lacquer thinner to clean up. They took it all without any lasting scars. Impressive. The only thing we did that left some scarring on the tiles was angrily smacking a pair of jack stands with a deadblow hammer while there was weight on them. Never a good idea, and even worse with nice tiles on the floor. That’s really the only thing we could do to hurt these things.
Also, having these tiles on the floor generally made our shop a more hospitable place. Clean, painted parts can be set directly on the tiles without needing to put down cardboard or towels to keep bare concrete from scratching them. You can dive under a car without a creeper or mat and not come up covered in dust and dirt. It really is a cool experience to work on this stuff. It may sound crazy, but working in a classy shop with a professional-looking floor seems to actually make us do better work. It's been a game changer.
So, in the end, how does Swisstrax compare to other DIY garage flooring ideas? Based on our experience, we would recommend this solution over an epoxy or painted floor. If you can get over the occasional annoyance of that lost washer or tiny screw, then the durability and lasting great appearance of Ribtrax is unmatched.